Welcome back to my build for the Hachette Partworks 1:8 scale model of the Batman Tumbler! As we’re just over half-way, the literal shape of things to come improves every time. I’m aware I’ve mentioned it before, but with every little element, you can roughly see the overall structure of the Tumbler, even if it’s not completely one whole beast to look at.
Today, I’m going big in terms of how many issues to cover, all the way from Issue #59 to #76 – which is an incredible 17 episodes of Bat-goodness. Now, as you may have seen before, some of these issues could well merge together, because they’re connecting parts so I’ve begun to understand that it makes more sense to blend the build, as otherwise I could stop half-way through a section.

While all the magazines continue to expand the Bat lore, from designers to writers and artists, they also keep up the coverage on the numerous different varieties of Batmobile as well. If you’re a Dark Knight fan and can memorise a whole host of information from all his years of existence, then the magazines do a respectable job of helping the geek in you know even more stuff. In truth, there’s so much that I’ve stepped away from summarising what each issue contains, with only the occasional nod to some personal favourite moments.
Just before we dive back into the build, if you wanted to look back through my build from Issues #1 to #52, then here for those blogs. Also, if you wanted to begin your journey at any time, then also click here to start your own. And, as ever, if you have any questions or queries, drop me a message in the comments below!
Issue 59
First up is an important mention for Issue 59’s magazine because it features Grant Morrison and Dave McKean’s Arkham Asylum: A Serious House on a Serious Earth, from 1989. While I immediately captured as a kid by Tim Burton’s film, my brother also happened to pick this graphic novel up and its imagery equally messed with my head and enthralled it, which might be the reason why I’ve always preferred the darker, more ground-level Batman. The story and the style are exceptional, with artwork that will find a place in your brain forever.
On the build side, this really isn’t too complex as you’re adding additional roof supports to the roof, you’d ‘worked on’ last time out in Issue 58. In essence, you’re continuing the job half-started there with further support brackets, connecting ones and a larger rear support bracket. Most of these click in together, with the aid of your own hands, and then some BP screws to get it sturdily into place.
Issue 60
Next is the putting together of two spoilers and a deflector, or left air intakes and an intake baffle – which I’m sure I ate once in an American Diner. Essentially, the wonderfully named ‘intake baffle’ is screwed onto the bottom of the intake, and it kinda looks like a little grate like you’d get on the outside of an air vent. It does suggest tweezers, but if you’re delicate enough you can use your fingers to hold it whilst doing the necessary SM screw work. It’s a pretty quick job.
Issues 61 to 65
And then, completely out of the blue/dark night, things get a lot more complex with Issues 61 to 65 – and it’s a very welcome one, if occasionally a little finnicky, like anything when you’re building a model!
If by chance you have three hands, then utilize that skill for these issues. You might also find some gaffer or masking tape useful, as there will be moments where you’re trying to screw in a screw so small that even a mouse would find it a little difficult, as well as the tiniest piece of metal you’ve ever seen that you definitely need for a hinge situation. All this is fine, just don’t do it if you’re a little sleepy – trust me.
Issue 61 itself is the beginnings of the left aileron on your Tumbler, or those little flappy bits on top of the engine panel and intakes you’ve previously/just put together. When completed, it’s fair to say it looks ace but in the process there’s a lot of tiny things to try and hold in place. Effectively fixing together two left aileron’s, pins, joints, actuators and a coupling (to pair up the top and bottom of the flap, you think it looks good but then you’re in the realms of adding it to the left air intake and engine panel – which is a bigger job but, again, I’m happy it’s here.


While Issue 61 starts the first part of this, Issue 62 drops the fun and only gives you one to do – so I’m happy I had bulk to build, as when you’re hitting Issue 63, you’re onto the right air take and it’s dedicated deflector and intake baffle, and connecting up the other side of the huge engine panel – and you can really visualise the whole section – even if not completed yet, which you can see in the pictures and the magazine also features the truly epic Batman Returns. Kudos.
Issue 64 keeps the aileron fun going with the right side, and although I did find the left one very frustrating, I think I must have learned something as it felt less complicated. It’s easy to say they probably didn’t need Issue 65 to have the other flap but, of course, it does – therefore making you wait just a little bit longer for that overall fun visual.
Issue 66
This one decides to give you the support frames and connectors for the back of the thing you just built. I’m glad they’re included though because there was some looseness on the rear of the engine ailerons but once these arrive, it makes more sense. As ever, the smaller parts can seem simple to see, but they’re a little awkward to screw into place but once achieved, it did give it a better strength to the section.
Issue 67 and 68
This one for Issue 67 and 68 decides to randomly throw in the right and left-centre console, and a few more complex components. Why this wasn’t earlier I don’t know, but maybe they’re spreading out the pieces to make it feel like it’ll suddenly come together, and it might to be fair!
Now, DP screws are one of my least favourite screws in builds. I know why they’re here and how much they can help, but they never seem to screw in constructively. In truth, there’s a lot of pieces in this console that aren’t perfectly formed together, the build of the plastic is okay, but it seems unnecessarily complex for the outcome.


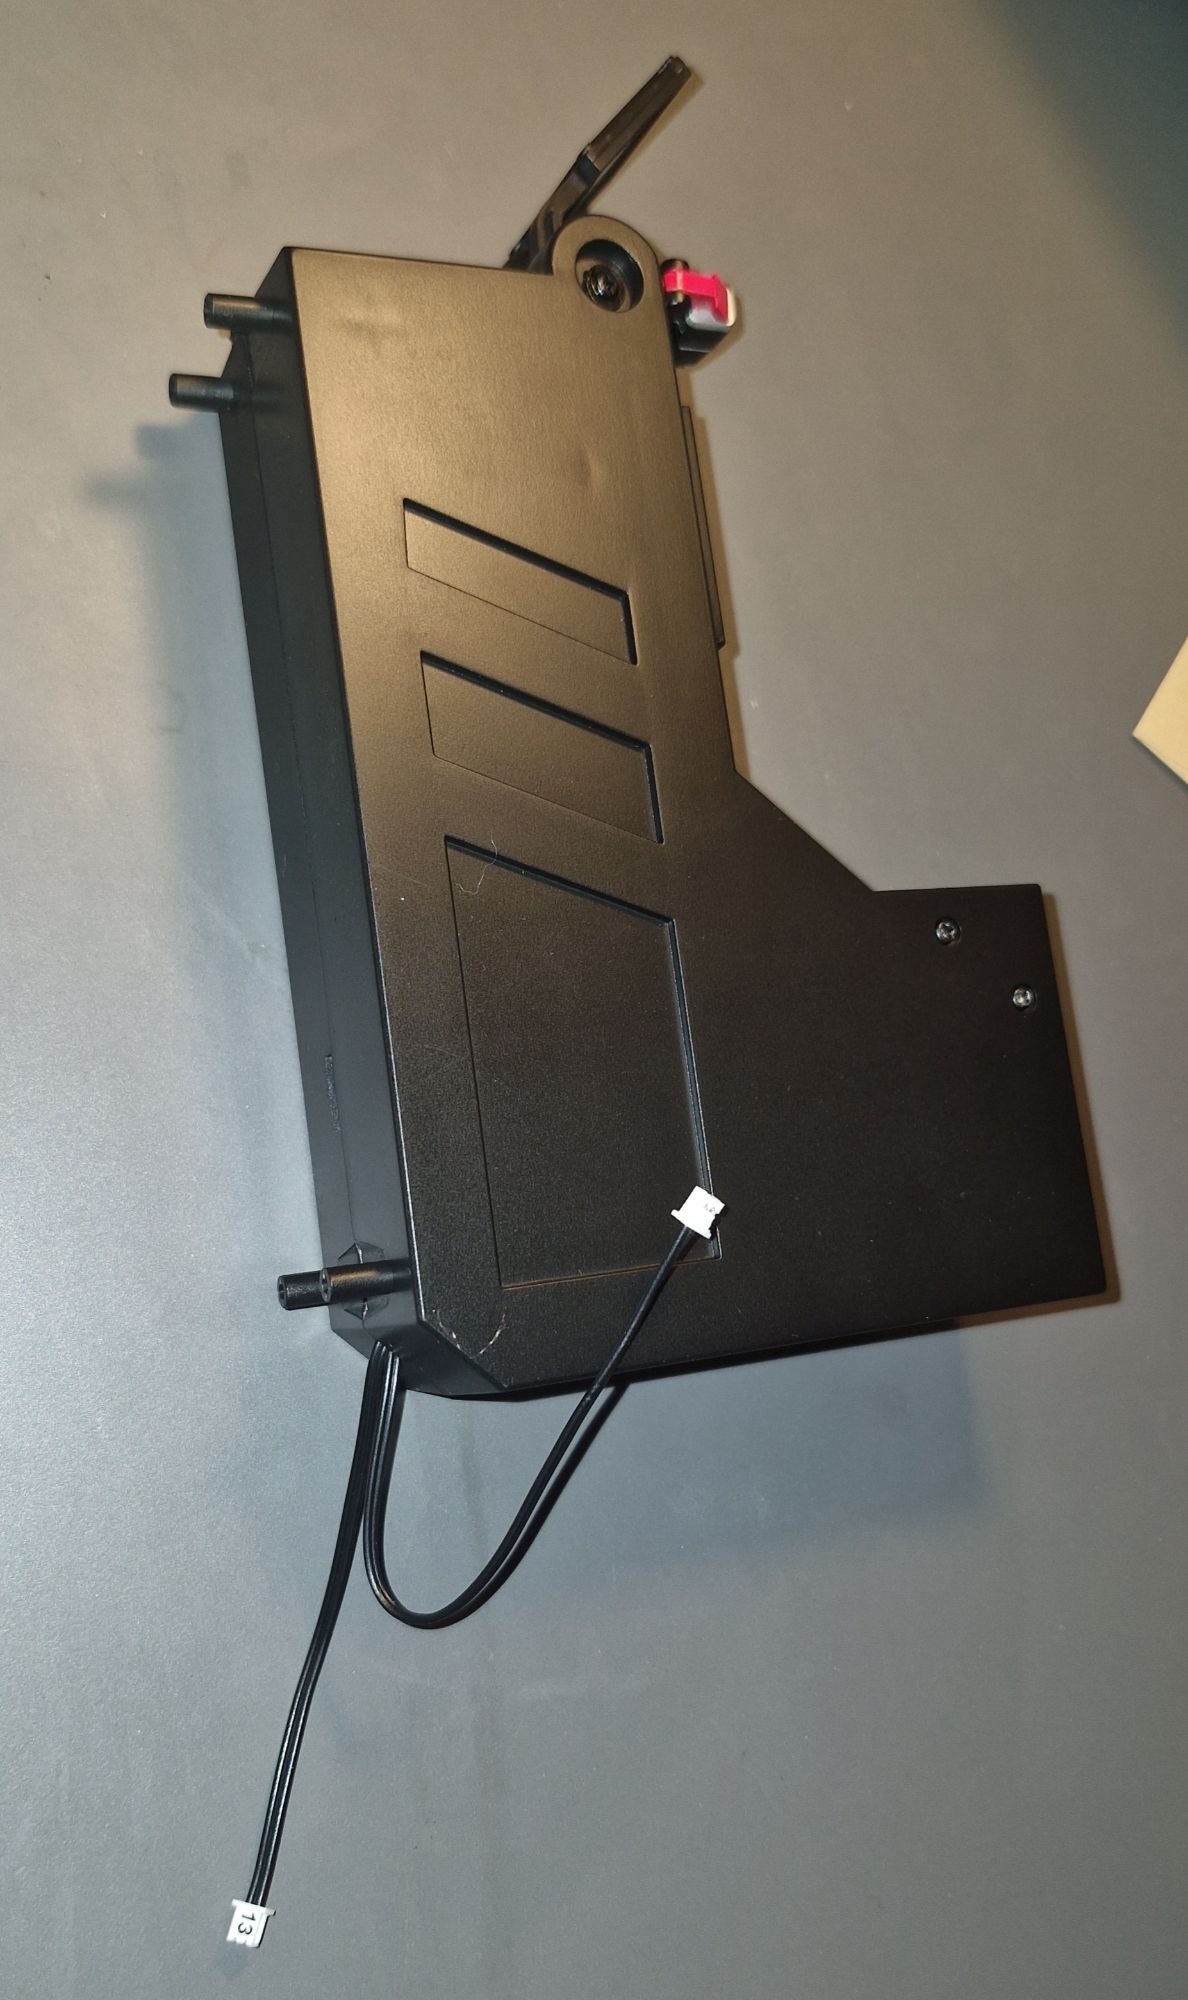
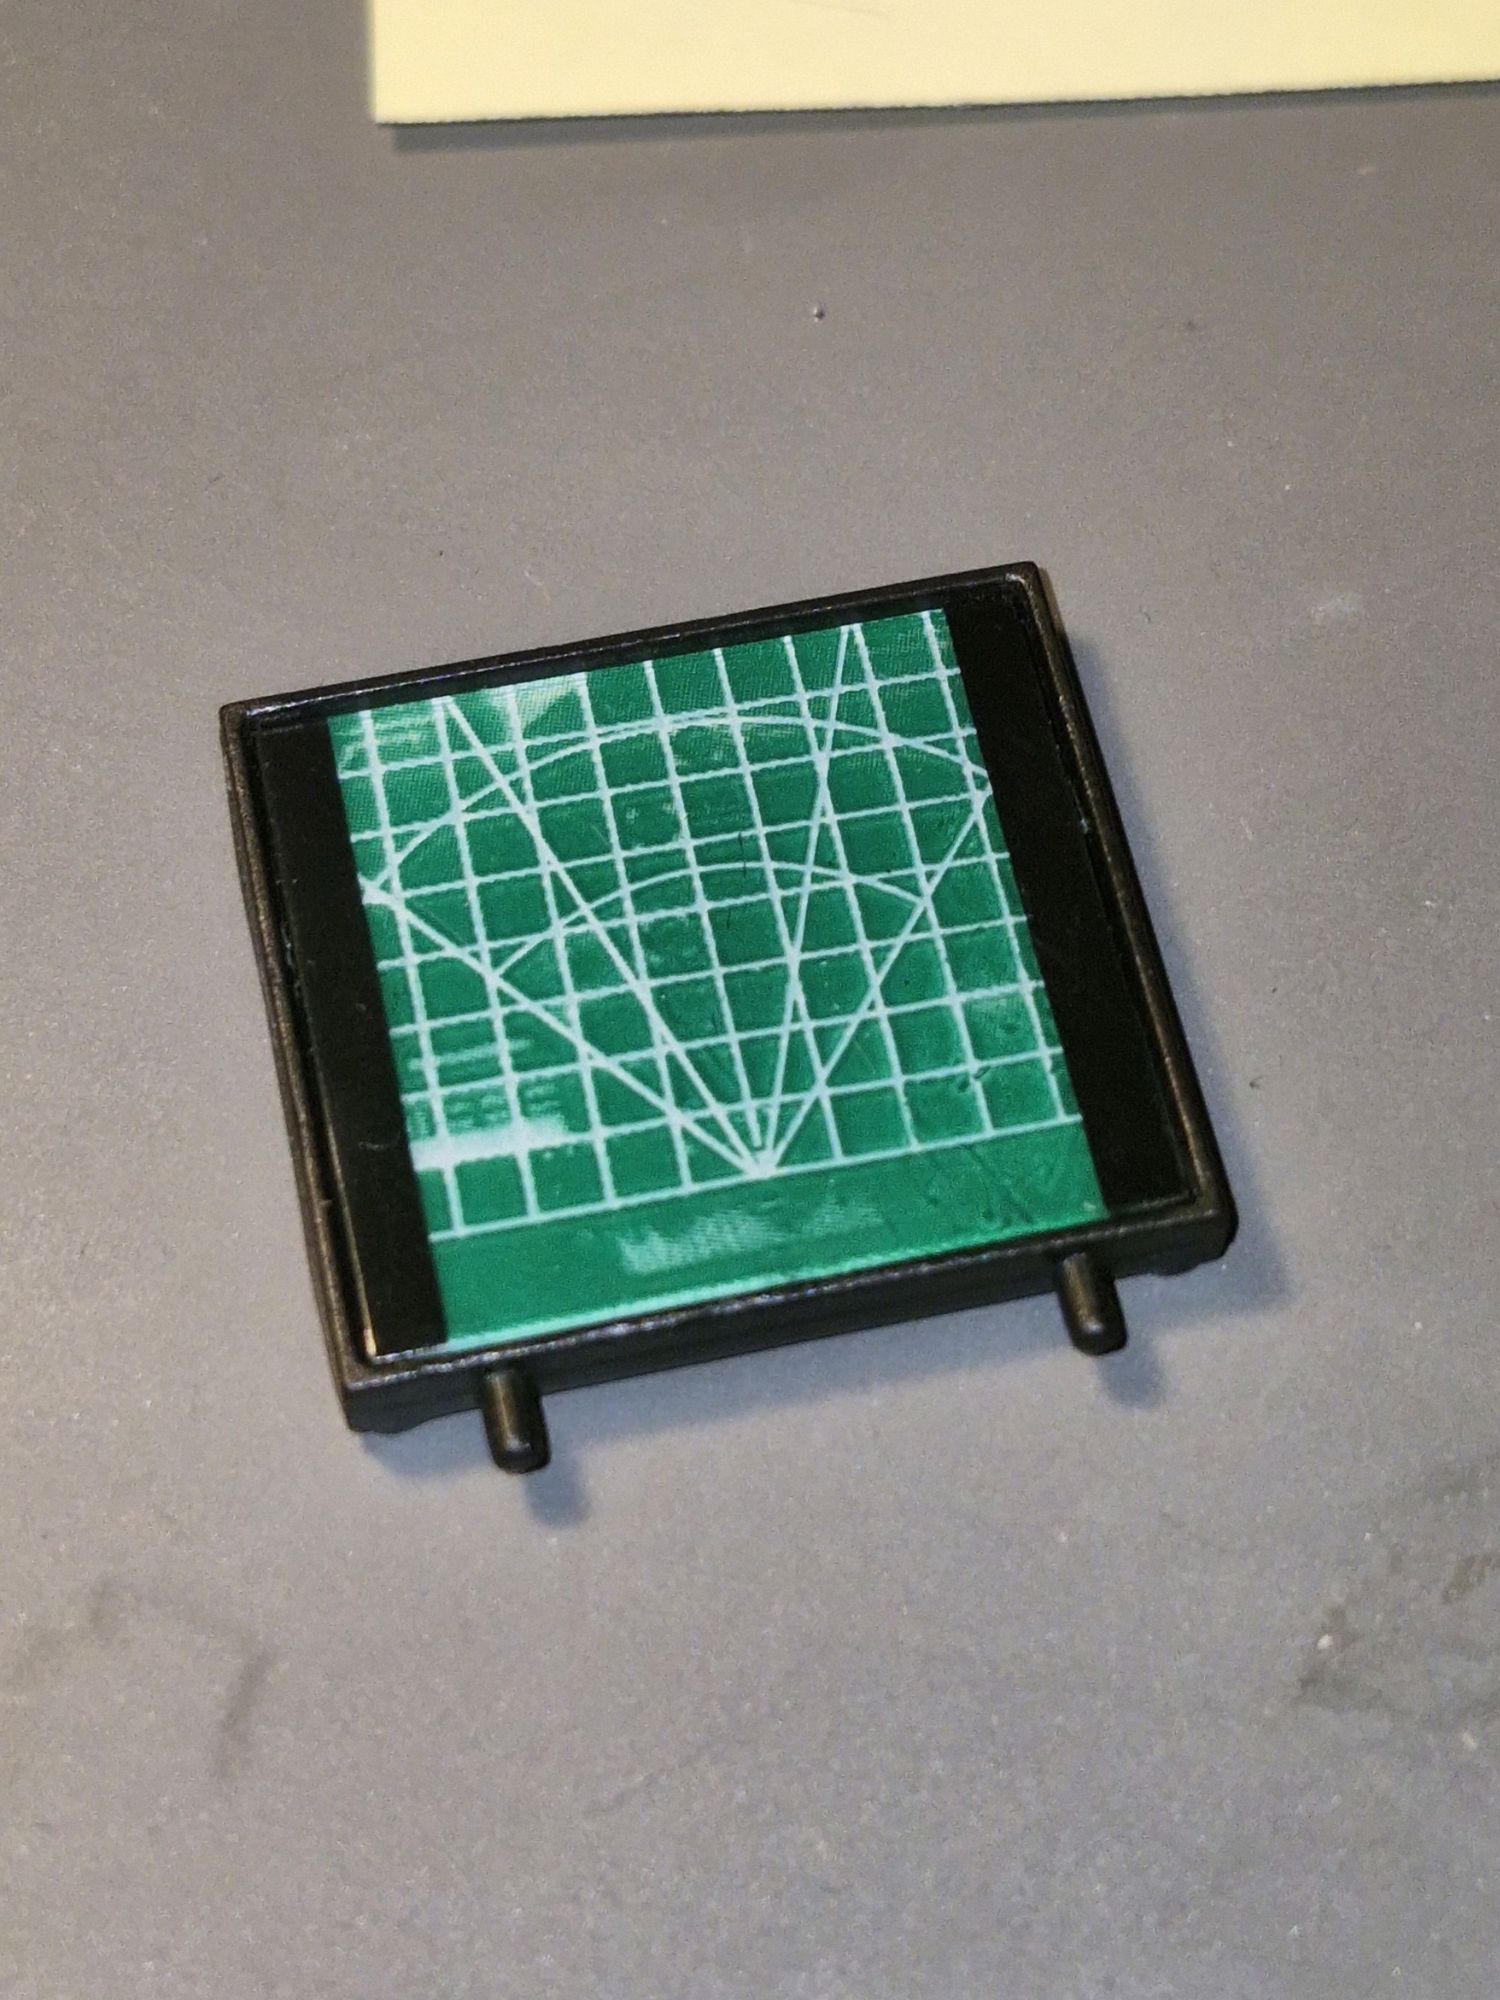
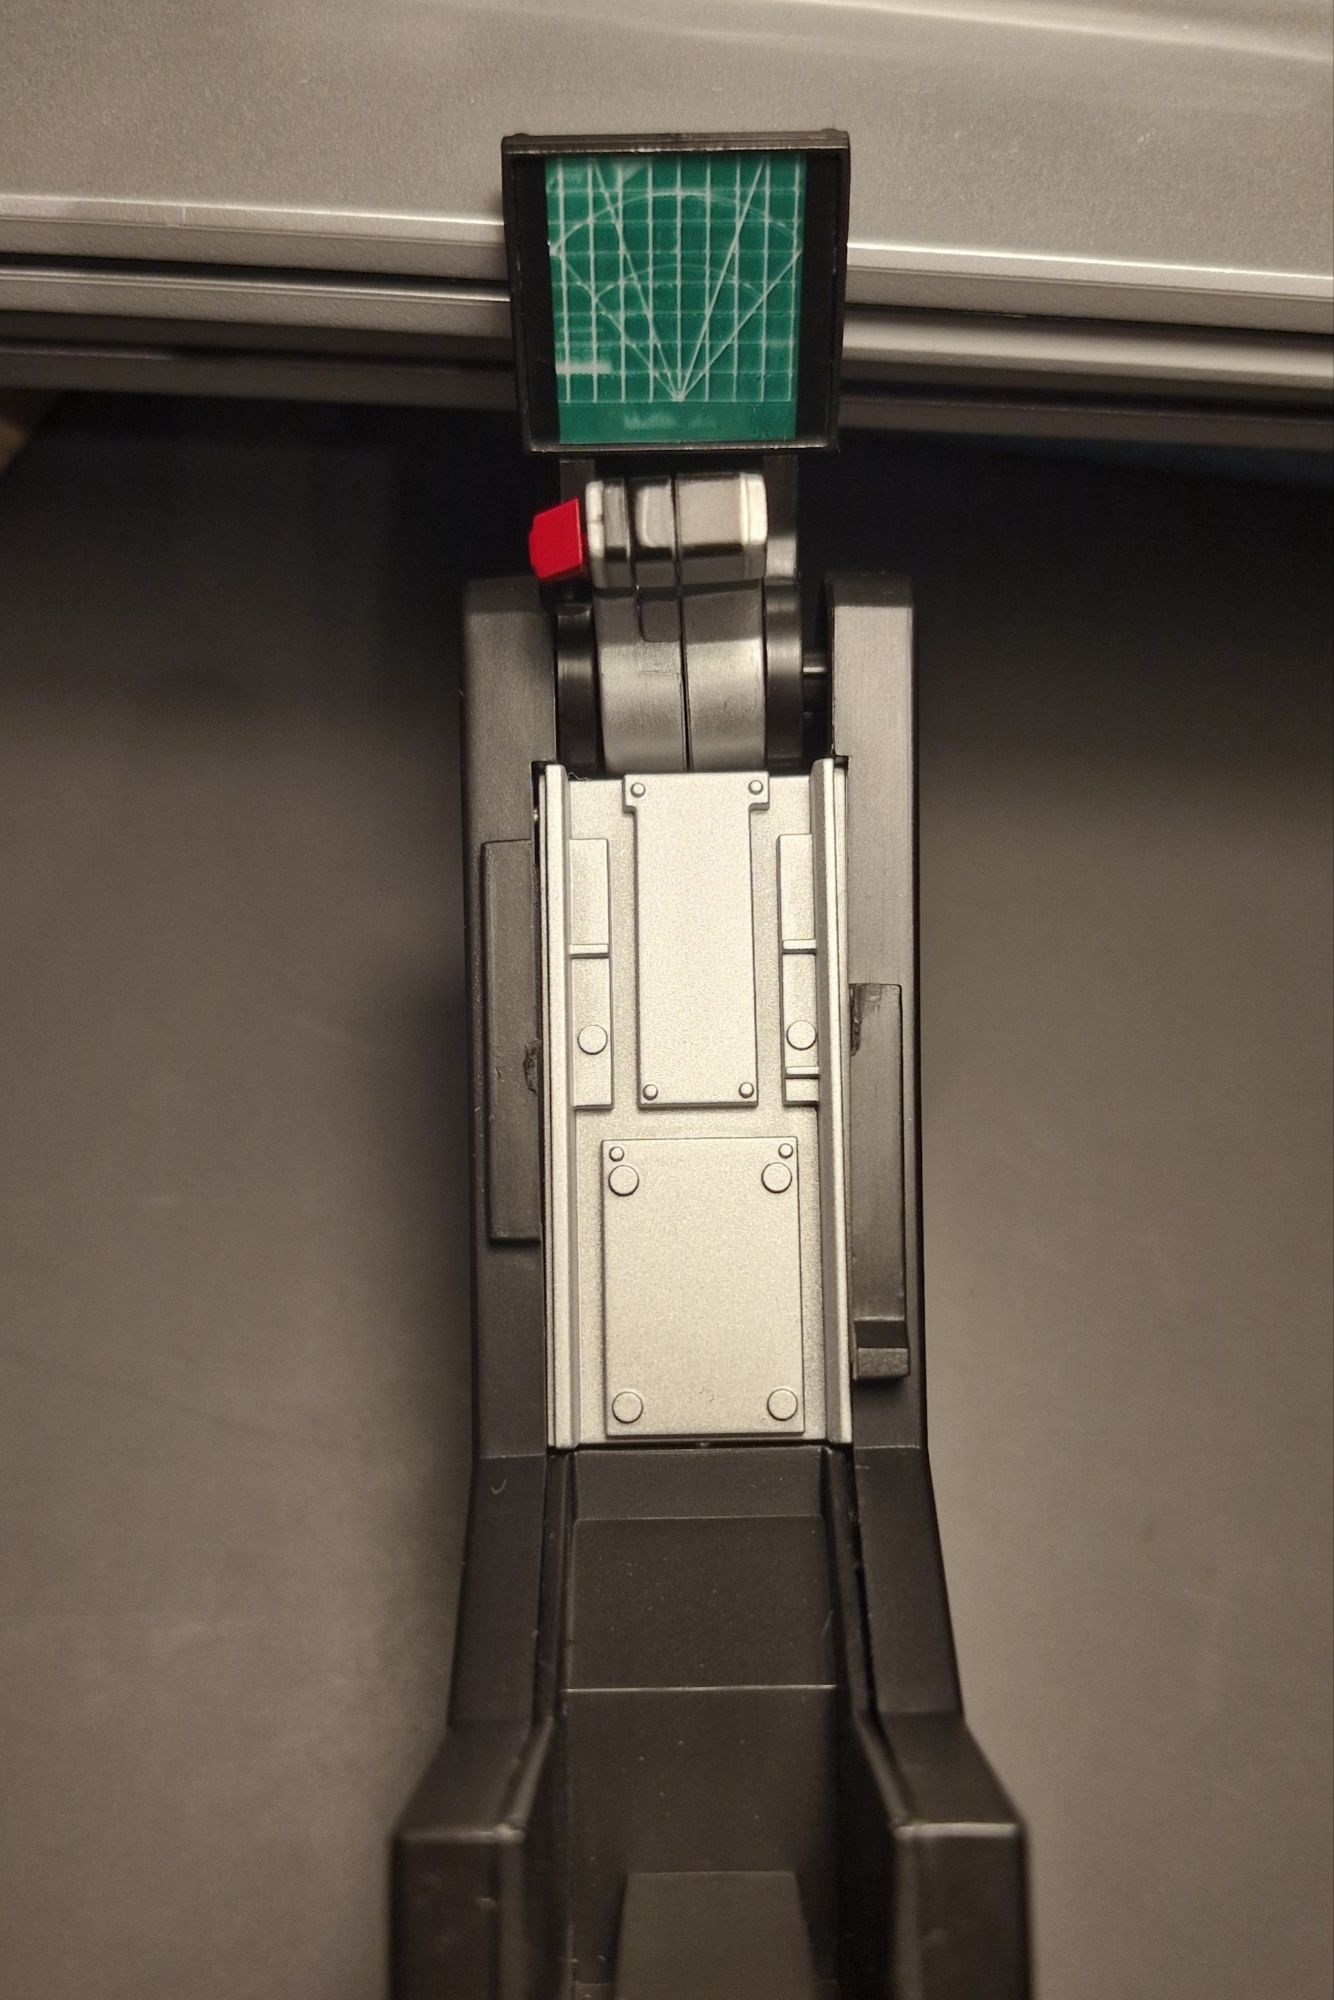
The 67B and 67C pin and support are a pain. It kind of sits where it should, but you can’t hold it manually without positioning yourself beyond reality. I did, however, get their eventually and while finished with the TV/computer screen in place looks fun – and some electronics – YAY – I wasn’t entirely sure of the point of every internal component and hoping it’ll be better eventually.
Issue 69 and 70
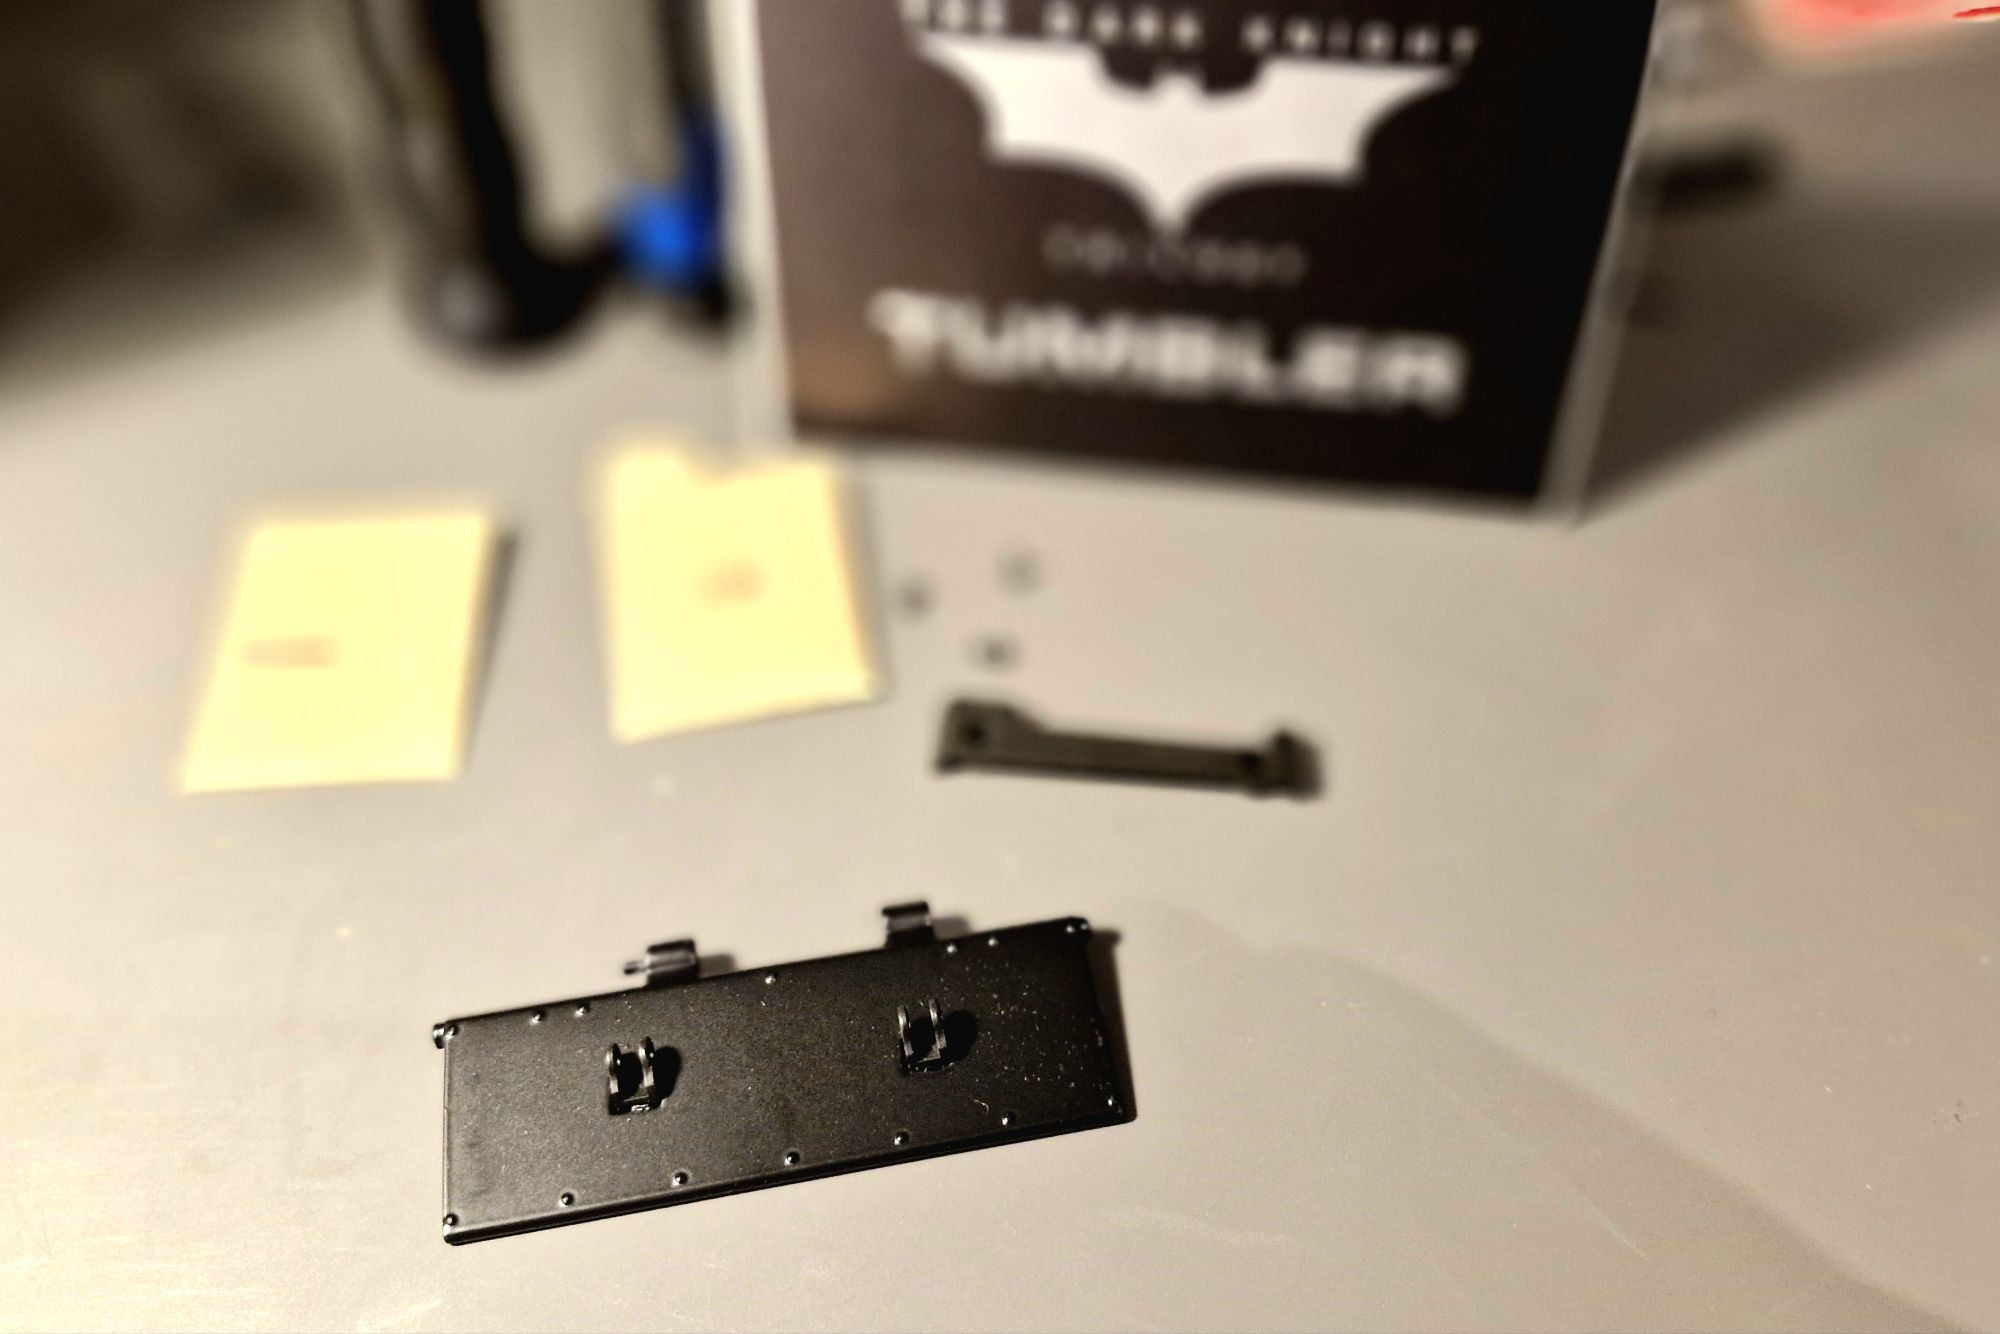
Returning to positivity… or endeavouring to, Issue 69 is just a left window and a frame. There’s no build here. Just a snap together. It looks nice though.
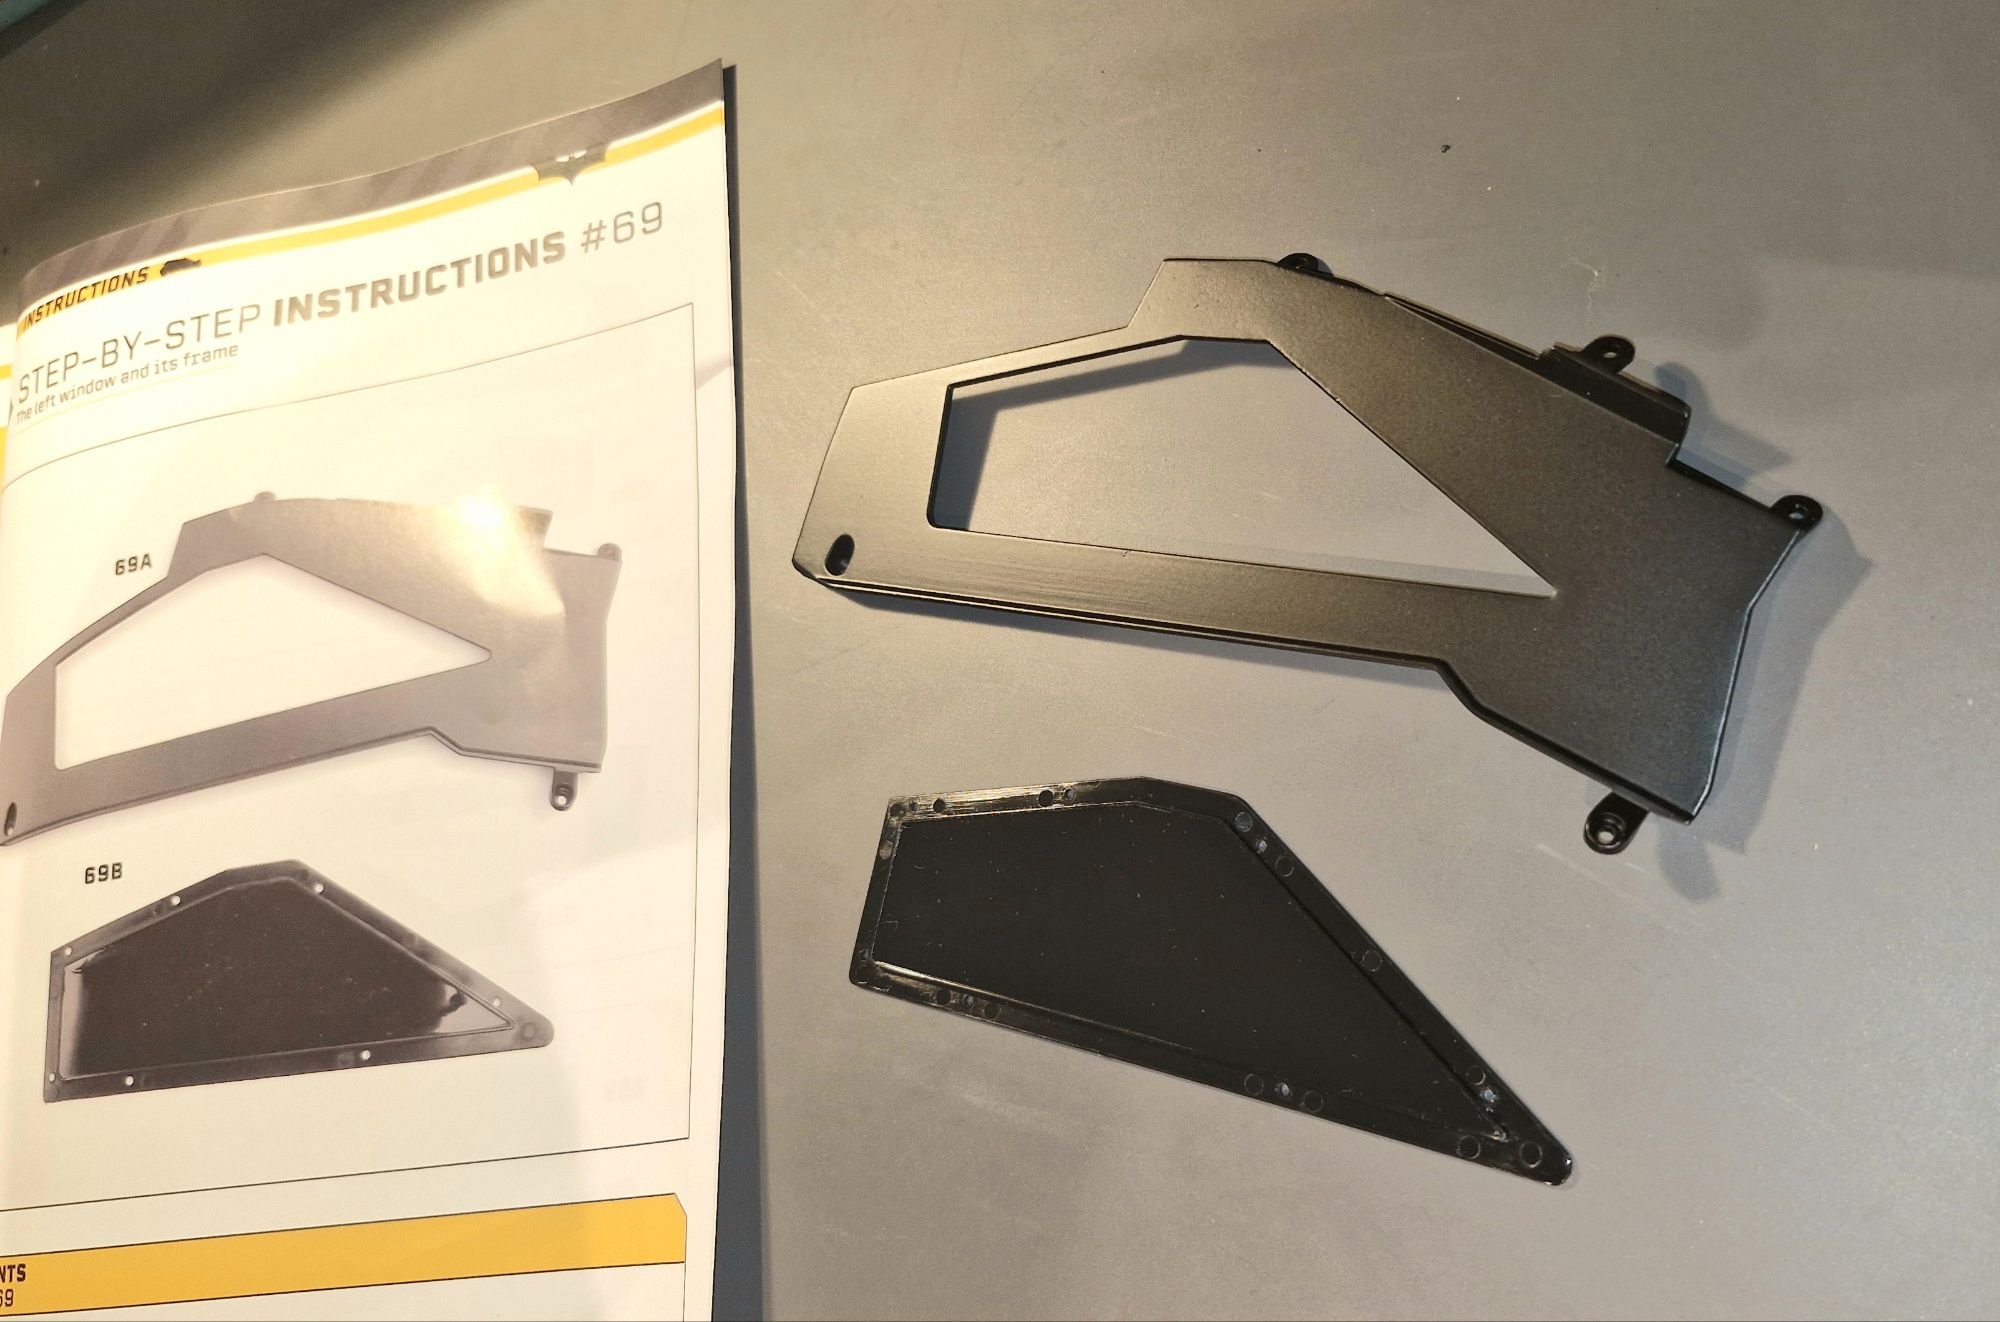
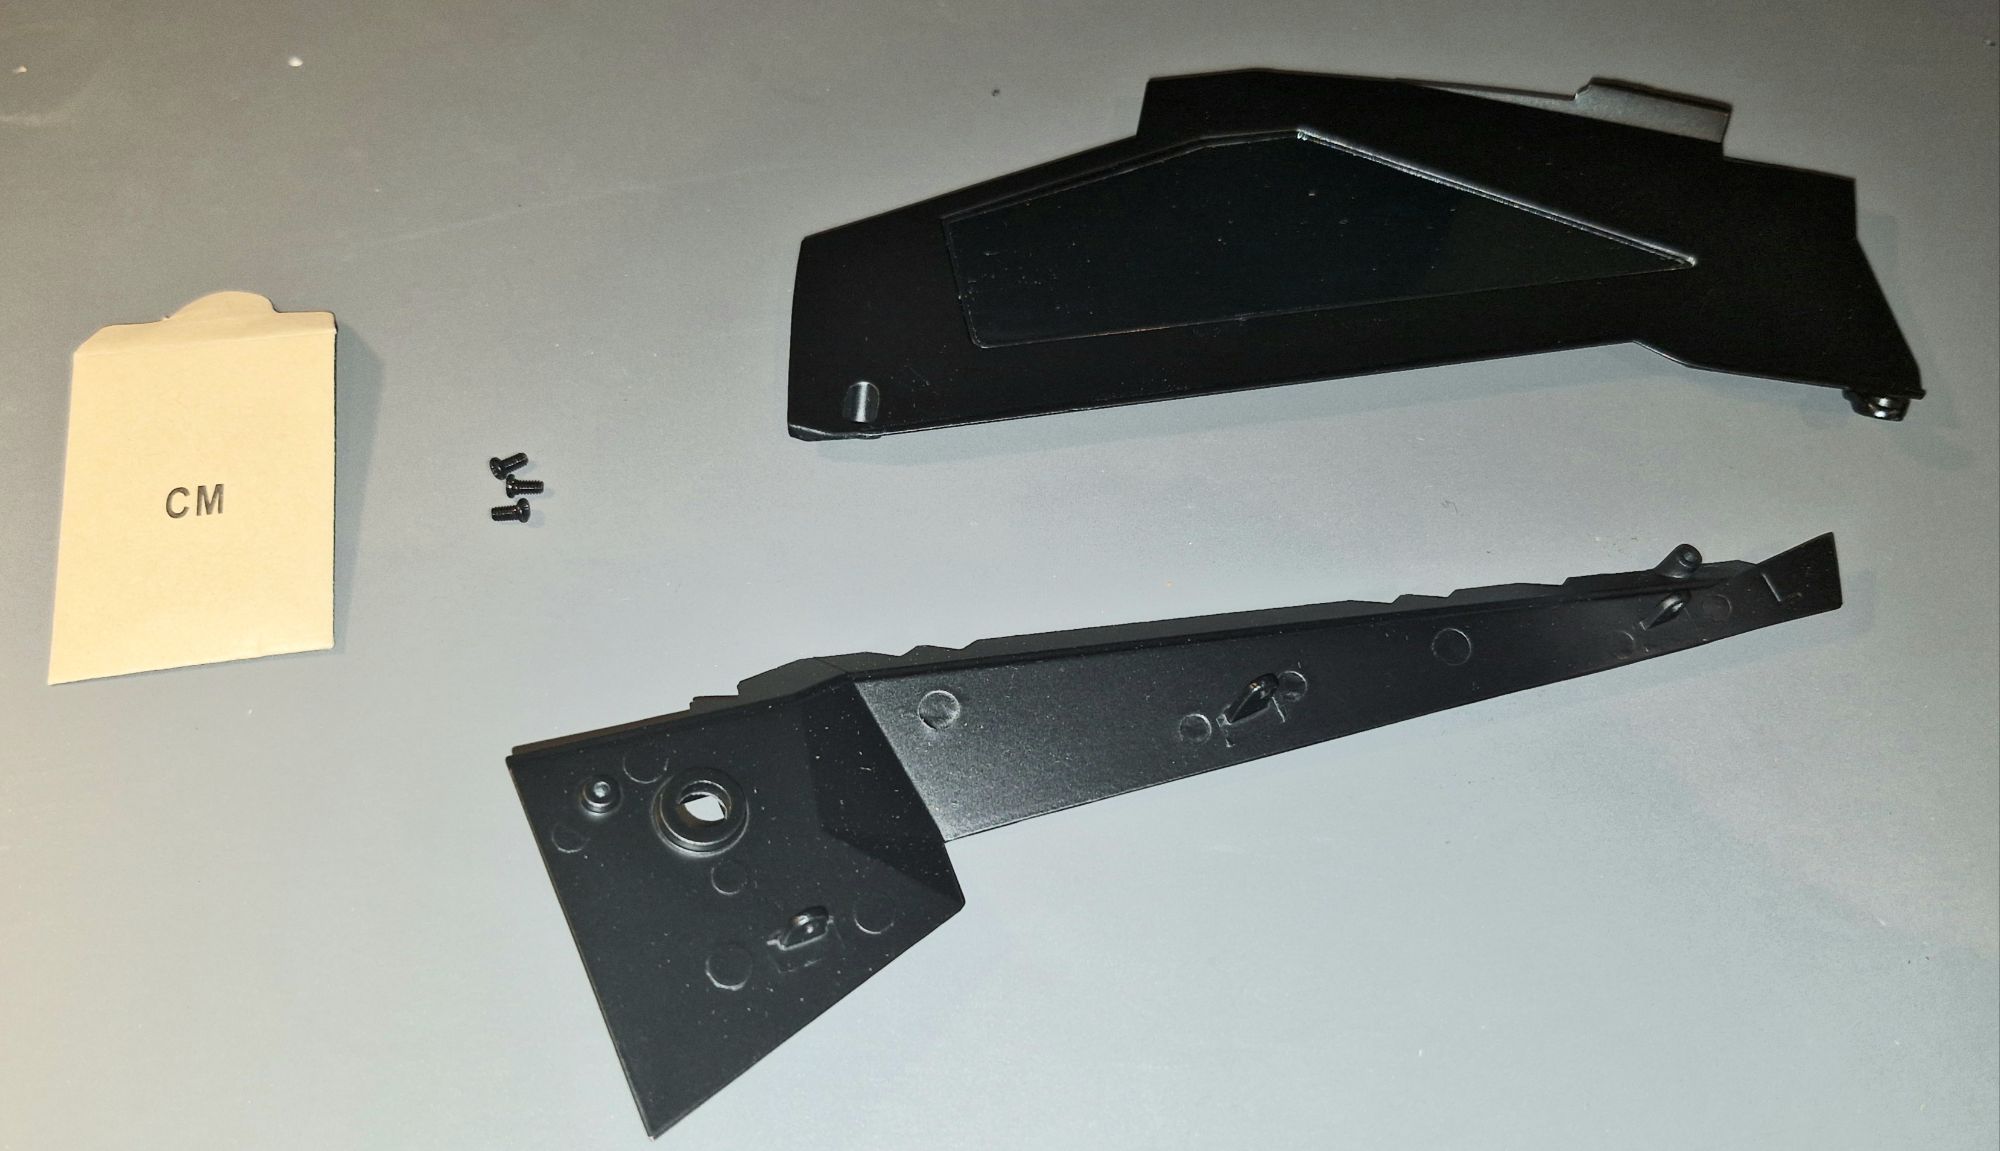
Issue 70 is segmented in because it then contains the left panel, that you’ll be attaching to the window frame you just made, which I did with the classic CM screws supplied. There’s not much more to say to either of these two issues, but if you’re struggling, I’d be surprised that you’d got this far. *Cheeky wink*
Issues 71 to 74
Now we’re adding the left flank, which is the left canopy for the window and panel previously constructed, and some nice canopy-looking-locks to slow into side – which both need to be pushed in the right way around, so make sure you click them in correctly. This little moment then makes for a fine window, panel and it looks stylistically excellent.
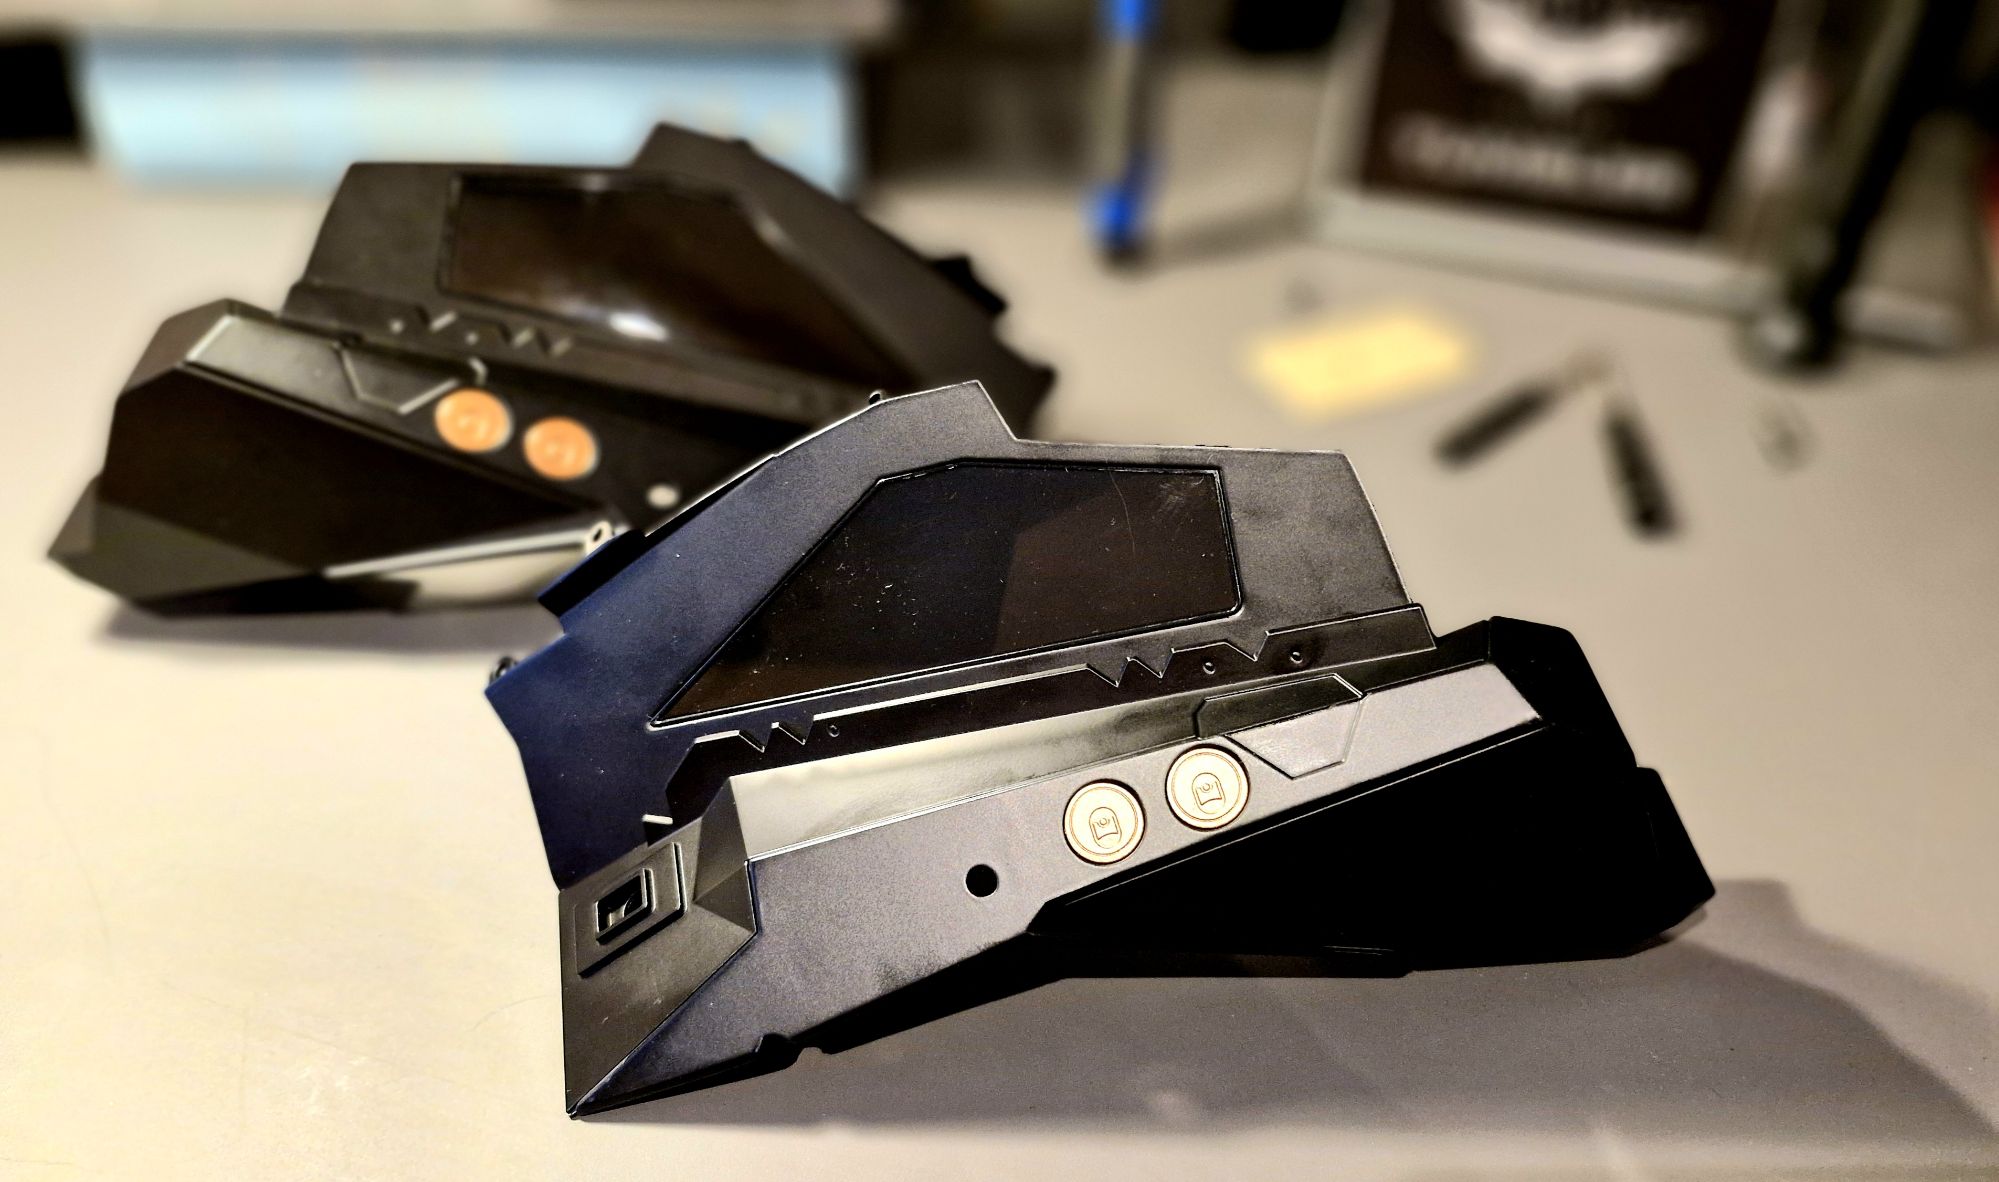


Then Issue 72 offers you the flip-side with the right window and frame, to snap into together, and again the right panel once you hit Issue 73, with Issue 74 following up the same pattern, but now the right flank to slot all these sections together – finishing off both those windows and the flanks for the left and right side, as these pics show you!
Issue 75 and 76
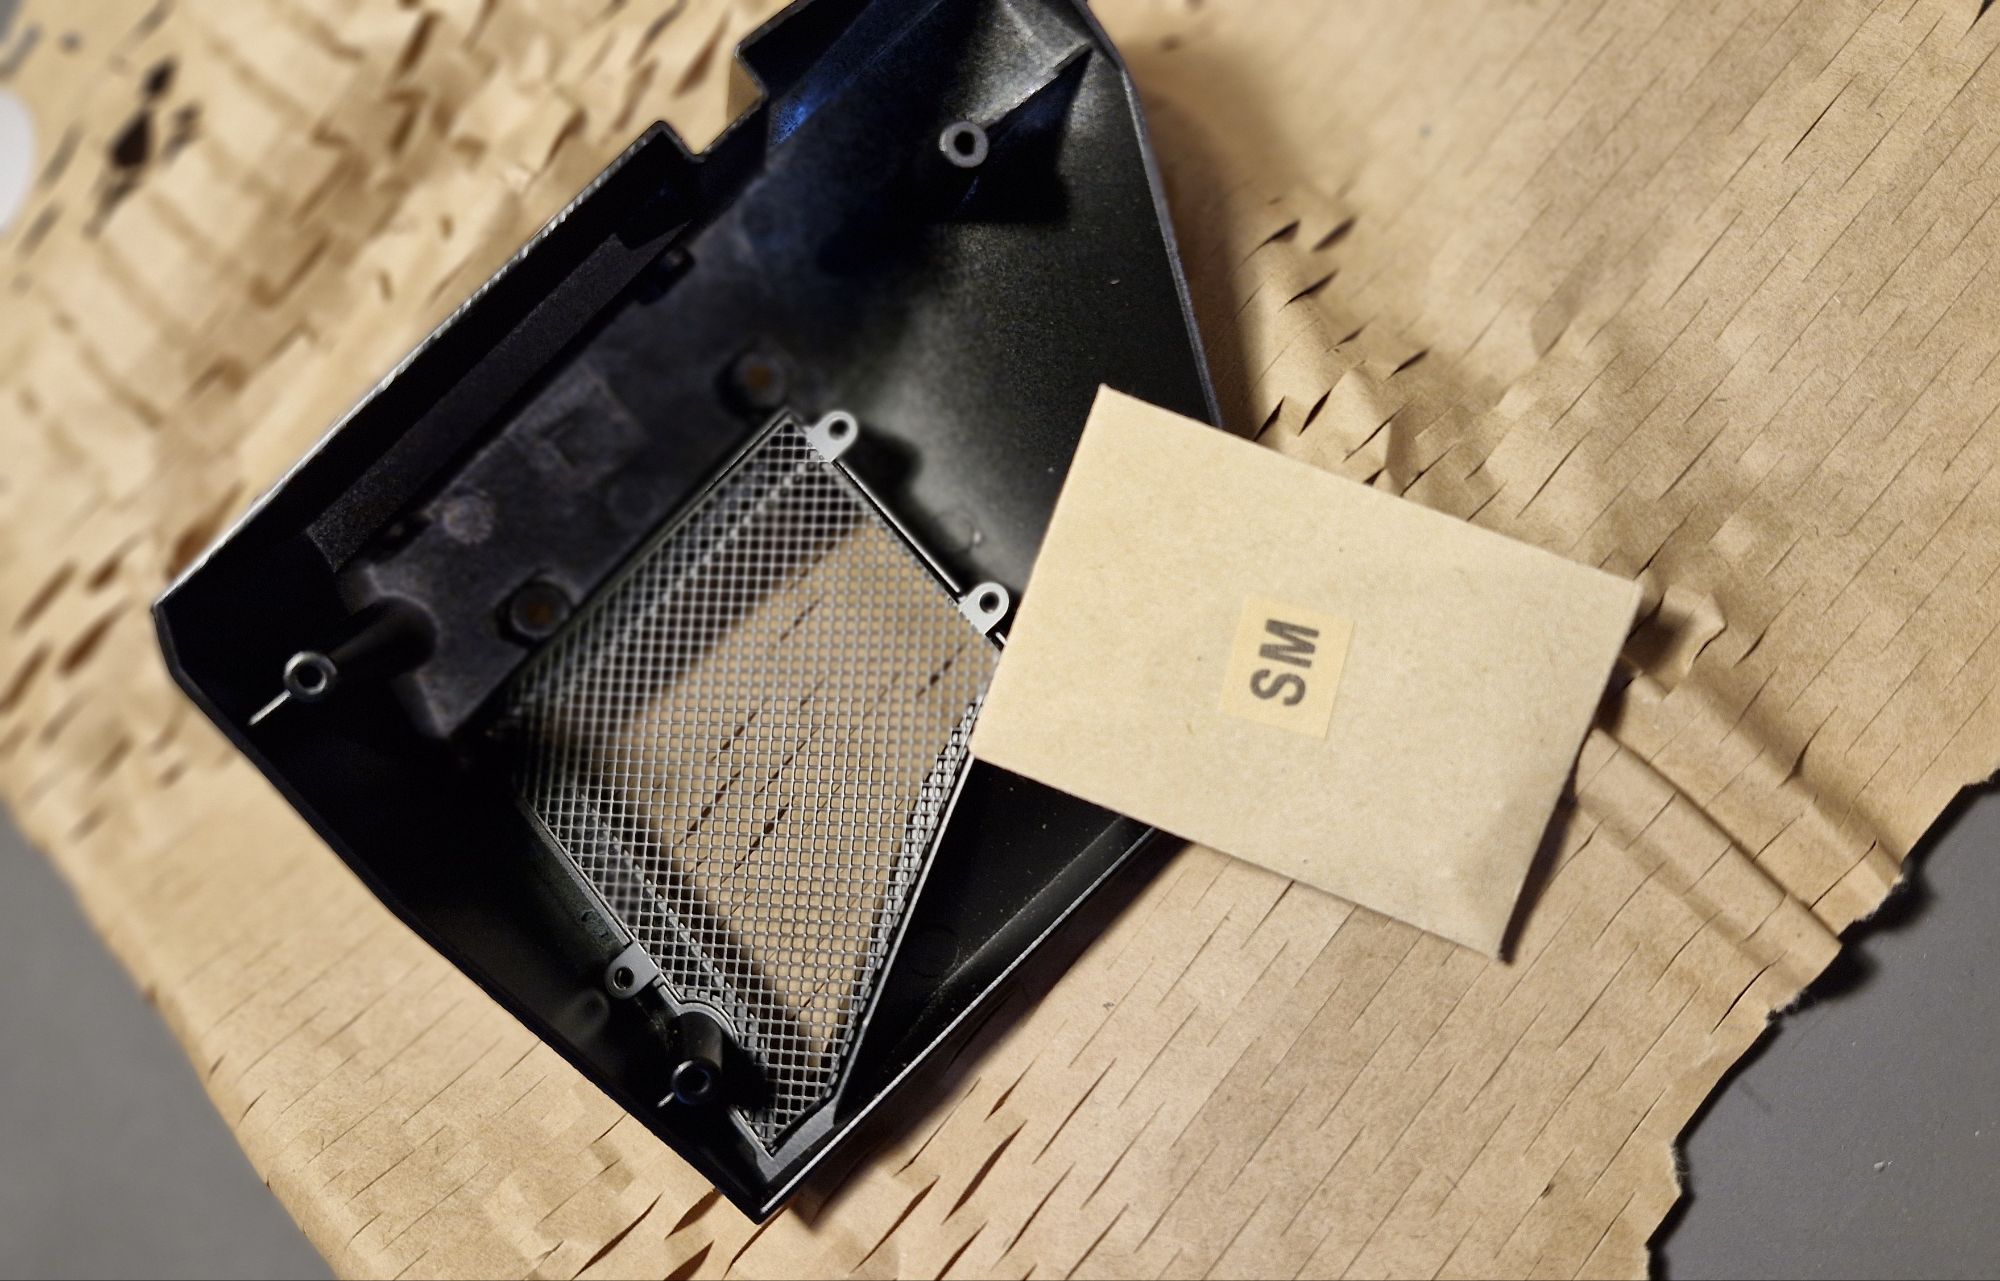
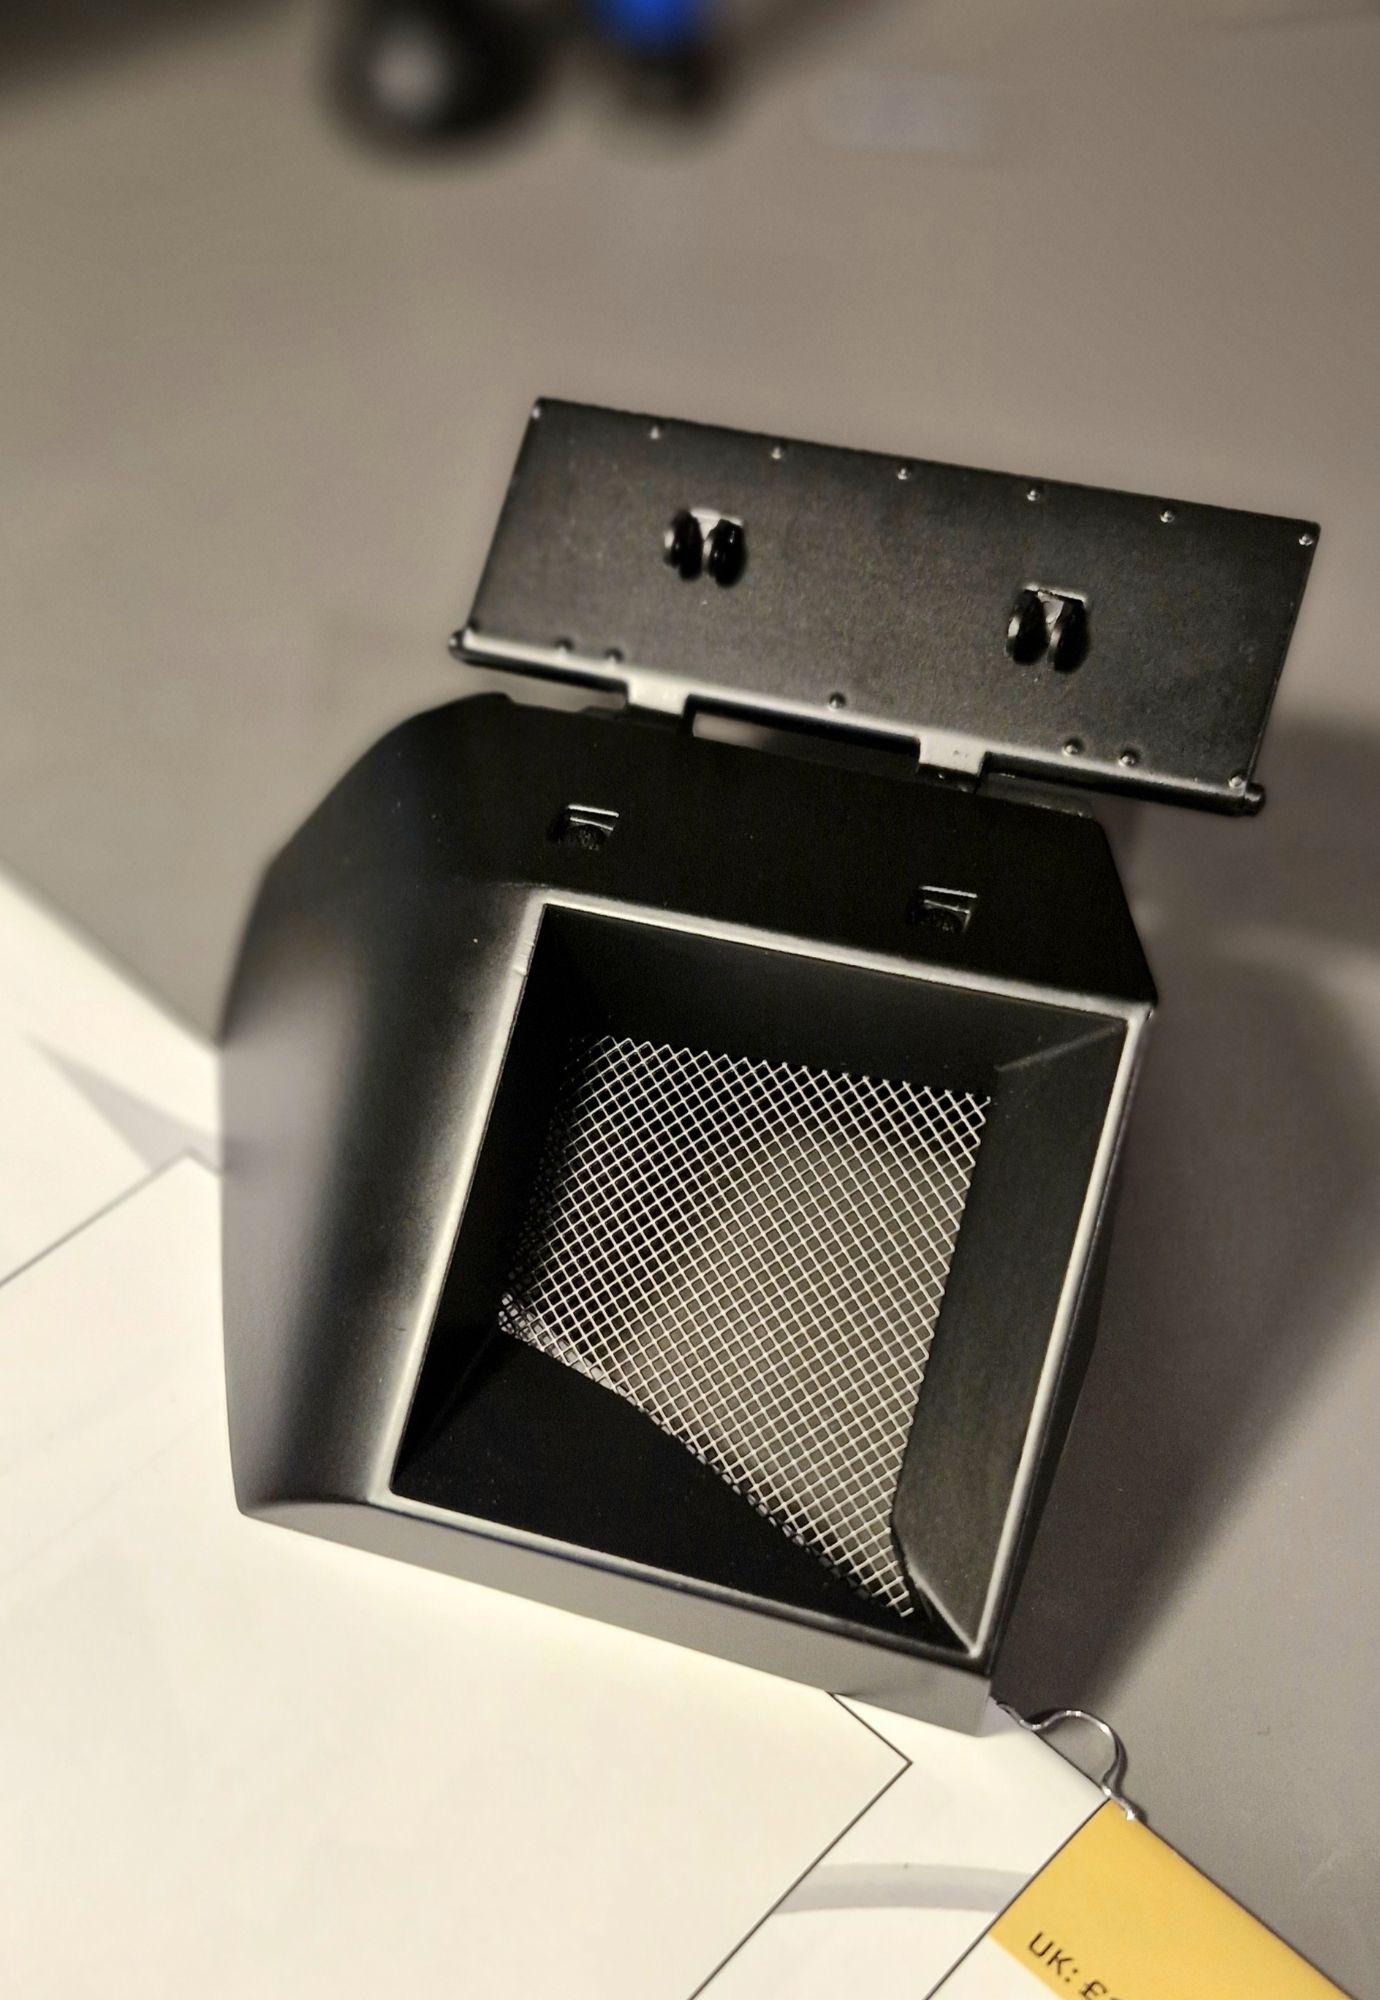
Now Issue 75 gives you a nice new thing to enjoy, and it may not be massive, but the left air intake has a fine grille to screw into the back of a chunky intake. It may not be the biggest overall part, but it’s a visually interesting section, and I think it’ll look classy on the overall model. Oh, and don’t forget to screw the SM’s in diagonally, rather than straight – which could be easy to miss!
And then, for the moment, we hit this month’s finale – which is a little left intake flap, with a pin and hinge. Thankfully, this hinge isn’t the size of a tiny seed – and is relatively easy to slot into place. I can see the space for when we hit Issue 77 and beyond, but for the moment this little flap and hinge connects really effortlessly with Issue 75, and I like the way the hinge is part of the mould itself, making it feel like it’ll be on the outside once the rest goes together.
And look at it, who doesn’t like a racy grille? And I’ll see you next time!


![Unquiet Guests review – Edited by Dan Coxon [Dead Ink Books]](https://criticalpopcorn.com/wp-content/uploads/2025/10/ug-reddit-ad-e1761690427755.jpg?w=895)

![Martyrs 4K UHD review: Dir. Pascal Laugier [Masters Of Cinema]](https://criticalpopcorn.com/wp-content/uploads/2025/10/image-1-e1761586395456.png?w=895)


![Why I Love… Steve Martin’s Roxanne [1987]](https://criticalpopcorn.com/wp-content/uploads/2016/11/roxanne.jpg?w=460)


Post your thoughts